Showing posts with label Windows Hub. Show all posts

Saturday, January 13, 2018

How To Delete File Undeletable File Item Not Found Error Fix | Tech2Fire


How to Delete A File That Could Not Be Found [Solved],
Item Not Found error - How to Delete Undeletable File,
Cannot Delete a Folder or File - [Solved] How To Delete A File That Won't Delete,
How to fix solve Windows cannot access the specified device, path, or file error,
Fix "Could Not Find This Item" When Deleting a file,

This video tutorial will show you how to delete an item that could not be found. I came across a problem when I tried to delete a file from my computer and I got a error message saying "Item Not Found" and "Could Not Find This Item".  I also got this message when trying to rename the folder: "The Source and Destination File Names are the Same". The problem is solved by following these intrsuctions.

In this tutorial i am going to show you how to remove a folder that refused to be deleted. This is really very easy. please fallow the step in this description.
First NAVIGATE TO THE FOLDER WHERE THE FOLDER THAT IS GIVING US IS LOCATE

cd /d c:\Users\USER\desktop

Next type in:    dir /x

next:   rmdir /q /s  type the folder name you want to dete

if thats not working out for you then try this.
its simple just right click then hit "add to archive" then under general will find "archive options" just click the first check box named as "delete files after archiving" hit that and then the process begins u relax and it will automatically delete but it will have left the compressed file but dont worry you can just delete by yourself by"shift+del" hope so you like.

This tutorial will show you a quick, simple and easy way to delete this file or folder from your computer.

Item Not Found error when deleting a folder or file
Could not find this item
This is no longer located in C:\Users\[My User Name]\Desktop. Verify the items location then try again. How to delete files and folders not found

Item Not Found,How to delete,undeletable file,could nt find this item,how to delete undeletable file,item not found,How,to,delete,file,from,computer,won't,let,you,it,Windows,XP,vista,Could not find item,infinite,loop,recycle,bin,cannot,remove,move,rename,error,message,fix,solved,refresh,cancel,could,not,find,this,item,error,when,deleting,folder,Windows,Computer,Microsoft Windows (Operating System),Tutorial,computer,error,fix,windows,file,antivirus,how to,not working,Windows,Windows Cannot access the specided device path or file,Tutorial,Microsoft Windows (Operating System),Windows Error,Windows 7 Error,Windows 8 Error,Windows Vista Error,Windows XP Error,Computer,Computer Error,fixed,path,windows7,Error,Error 0×00000709,Operation Could Not be Completed,Printer,Default printer,0x00000709 printer,0x709,0x00000709

Tuesday, June 20, 2017

Windows XP Black Edition x86

12:51 AM Posted by Magneto Mohit , No comments
Windows XP Black Edition

It's a third party modified OS. We aren't the owner of this file. Use it at your own risk. We aren't responsible for any kind of loss.
It's a fully customized operating system created by third party developers. Windows XP is a personal computer operating system that was produced by Microsoft as part of the Windows NT family of operating systems. It was released to manufacturing on August 24, 2001, and broadly released for retail sale on October 25, 2001. Development of Windows XP began in the late 1990s as "Neptune", an operating system built on the Windows NT kernel which was intended specifically for mainstream consumer use—an updated version of Windows 2000 was also originally planned for the business market. However, in January 2000, both projects were shelved in favor of a single OS codenamed "Whistler", which would serve as a single OS platform for both consumer and business markets. Windows XP was a major advance from the MS-DOS based versions of Windows in security, stability and efficiency due to its use of Windows NT underpinnings. It introduced a significantly redesigned graphical user interface and was the first version of Windows to use product activation in an effort to reduce its copyright infringement.
          Upon its release, Windows XP received generally positive reviews, with critics noting increased performance (especially in comparison to Windows ME), a more intuitive user interface, improved hardware support, and its expanded multimedia capabilities. Despite some initial concerns over the new licensing model and product activation system, Windows XP eventually proved to be popular and widely used. It is estimated that at least 400 million copies of Windows XP were sold globally within its first five years of availability, and at least one billion copies were sold by April 2014. Sales of Windows XP licenses to original equipment manufacturers (OEMs) ceased on June 30, 2008, but continued for netbooks until October 2010. Windows XP remained popular even after the release of newer versions, particularly due to the poorly received release of its successor Windows Vista. Vista's 2009 successor, Windows 7, only overtook XP in total market share at the end of 2011.
          Extended support for Windows XP ended on April 8, 2014, after which the operating system ceased receiving further support or security updates to most users. As of November 2016, Windows XP desktop market share makes it the fourth most popular Windows version after Windows 7, Windows 10 and Windows 8.1. Windows XP is still very popular in some countries; Africa as a whole and in Asia, e.g. in China, with it running on one third of desktop computers (and highest ranked in North Korea).


Sunday, June 18, 2017

Super Anti Spyware 6.0.1224 Latest Version

10:01 AM Posted by Magneto Mohit , No comments


Super Anti Spyware


Super Anti Spyware Professional features our highly advanced Real-Time Protection to ensure protection from installation or re-installation of potential threats as you surf the Internet. Used in conjunction with our First Chance Prevention and Registry Protection, your computer is protected from thousands of threats that attempt to infect and infiltrate your system at startup or while shutting down your system.

Advanced Detection and Removal


  • Detect and Remove Spyware, Adware, Malware, Trojans, Dialers, Worms, KeyLoggers, HiJackers, Parasites, Rootkits, Rogue Security Products and many other types of threats.
  • Light on System Resources and won't slow down your computer like many other anti-spyware products. Won't conflict with your existing anti-spyware or anti-virus solution!


Real-Time Protection


  • Real-Time Blocking of threats! Prevent potentially harmful software from installing or re-installing!
  • First Chance Prevention examines over 50 critical points of your system each time your system starts up and shuts down to eliminate threats before they have a chance to infect and infiltrate your system.
  • Schedule either Quick, Complete or Custom Scans Daily or Weekly to ensure your computer is free from harmful software.


Additional Details


Version 6.0.1224 latest version
Size 26.15 MB
Requirements Windows (All Versions)
License Freeware
Date Added 12 Sept 2016


Thursday, June 15, 2017

Difference In Windows 10S Vs Windows 10

11:37 PM Posted by Magneto Mohit No comments
Microsoft


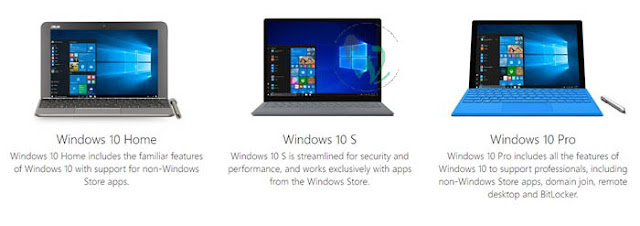
Microsoft recently announced a special version of Windows 10 aimed primarily at teachers, students, and for use in educational institutions. Windows 10 S, as the new OS is called, is built from the core of Windows 10 Pro, but is meant to be faster, more secure, lightweight, and with improved battery life over its sibling operating systems. So, if you’re wondering what the differences between these two operating systems are, we pitched Windows 10 S vs Windows 10, and here are the differences you should know:

No Non-Store Apps

Windows 10 S is Microsoft’s own take at a “Walled Garden” OS, something that Apple perfected with iOS. Microsoft mentions that laptops running Windows 10 S will not be able to install apps from sources other than the official Windows Store, just like the Windows RT platform. This may be both a good thing, and a bad; and a lot depends on whether major third party developers repackage their apps for the Store or not.

Not allowing installation of apps from other sources will definitely improve the overall security of the system. Plus, app updates will be managed more efficiently, if every app is from the Windows Store only. However, all of these good things will go to waste, if popular third party apps like Chrome, Photoshop, Firefox etc. are not repackaged for the Windows Store.


Fixed Default Browser and Search Engine

Another major difference between Windows 10 S and other versions of Windows, is that users with Windows 10 S will not be able to change the default web browser from Edge. Users may install any browser as long as it’s available in the Windows Store (Chrome isn’t, by the way), but the default browser will remain Microsoft Edge.

To make matters worse, Microsoft also announced that the default search engine on Edge will not be configurable, and users will have to stick with Bing for their search results.

Better Performance and Battery Life

Microsoft claims that the new operating system will have a much better battery life than Windows 10, and will perform way better, thanks to the fact that Windows 10 S is a lightweight version that is built from the core of Windows 10 Pro. According to Microsoft, the Surface Laptop is faster than a 13″ Mac-book Air, and has a battery that can last ~14 hours on continuous video playback.


Microsoft


This is a big deal, because the 13″ Mac Book Air lasts for ~12 hours on a single charge, and the new Surface Laptop reportedly lasts longer, while having a Full HD display, and a touch screen.

Upgrade to Windows 10 Pro

Microsoft obviously did realise that a lot of people buying the Surface Laptop wouldn’t want the powerful hardware inside the laptop to be hampered by a trimmed down operating system. To that effect, Microsoft is offering Windows 10 S users the chance to upgrade their laptops to Windows 10 Pro for free, until the end of 2017. After that, users can pay a reasonable $50 for upgrading their devices to Windows 10 Pro.


Microsoft


Upgrading to Windows 10 Pro will remove the restrictions that Microsoft puts on Windows 10 S, and users will be able to install apps from sources other than the Windows Store as well. However, shifting to Windows 10 Pro is an irreversible action, and users who shift to Windows 10 Pro will not be able to move back to Windows 10 S.

Windows 10 S vs Windows 10: Other Minor Differences

That’s not all, though, there is a lot more if you care to know, mostly related to enterprise related features. For example, Windows 10 S does come with enterprise related features such as “Azure AD Domain Join” and what not. So, if you’re looking for a good looking laptop that packs in great tech, look no further than the Surface Laptop. It packs in quite the punch, and if you’re unhappy with Windows 10 Pro, you can upgrade for free before the end of the year, after which you’ll have to pay $50 for the upgrade.


Microsoft


SEE ALSO: Windows Keys Country Wise

Windows 10 S: AKA Microsoft Pulled an Apple

With Windows 10 S, Microsoft is trying to create a harmonious ecosystem of apps and services targeted mostly for education. With that in mind, Microsoft pulled out a couple of features, added optimizations where it matters (battery life and performance, hell yes!), and made it all work together. While this will feel like a walled garden – a title usually attributed to iOS, and mac OS devices – as long as the Windows Store gets love from major developers, Windows users are about to realise how a tighter than usual OS can actually make for a much better experience.

Wednesday, June 14, 2017

CCleaner Professional With 100% Working Keys

CCleaner serial keys


CCleaner is the number-one tool for cleaning your PC. Trusted by millions and critically acclaimed, there’s a reason why CCleaner is the world’s favorite PC optimization tool. CCleaner’s patented registry cleaner clears out this clutter to make your PC more stable.
          CCleaner (formerly Crap Cleaner), developed by Piriform, is a utility program used to clean potentially unwanted files (including temporary internet files, where malicious programs and code tend to reside) and invalid Windows Registry entries from a computer.


We don't support the cracked versions. We respect the developers. This article is only for education purpose. If you like this program, then buy it from the developers. They deserve it.

Features:-

CCleaner can delete temporary or potentially unwanted files left by certain programs, including-

Microsoft Edge
Internet Explorer
Google Chrome
Mozilla Firefox
Opera
Safari
Nero
Adobe Acrobat
McAfee
Adobe Flash Player
Sun Java
WinRAR
WinAce
WinZip
Windows Media Player
eMule
Google Toolbar
Netscape
Microsoft Office
GIMP and many more.
          It cleans browsing history, cookies, recycle bin, memory dumps, file fragments, log files, system caches, application data, autocomplete form history, and various other data. It also includes a registry cleaner to locate and correct problems in the Windows registry, such as missing references to shared DLLs, unused registration entries for file extensions, and missing references to application paths. CCleaner v2.27 and later can wipe the MFT free space of a drive, or the entire drive.

What to do :-

  • Just download a fresh copy from official site. To visit the site please click here.
  • Now install the program.
  • Turn off your internet connection.
  • Enter your serial key
Enjoy !!

Serial Keys :-

 C2YW-IAHG-ZU62-INZQ-WZPC

 C2YW-2BAM-ADC2-89RV-YZPC

 C2YW-XFCX-ABIG-GZD4-8ZPC

 C2YW-XK32-GBVV-N3BH-2ZPC

 C2YW-JKW5-KK79-XHR2-4ZPC

 C2YW-QTRT-ZVCG-PQDK-CZPC

Thursday, May 25, 2017

How To Restore Old Windows Photo Viewer

1:42 AM Posted by Magneto Mohit No comments
Old Windows Photo Viewer


Windows Photo Viewer is used to open images files such jpg, jpeg, gif and many more. This program succeeds Imaging for Windows. In Windows 10, it is deprecated in favor of a Windows Store app called Photos, although it can be brought back with a registry tweak. Windows Photo Viewer can show individual pictures, display all pictures in a folder as a slide show, reorient them in 90° increments, print them either directly or via an online print service, send them in e-mail or burn them to a disc. It is very easy to use software. In this post I gonna show you, how you can use it and get it back.

What you need :-

You need a registry file which you can download below.

Thursday, May 18, 2017

Keyboard Shortcuts For Windows

5:20 PM Posted by Magneto Mohit No comments
Windows Keyboard


Here we are giving most of the keyboard shortcuts to make your work a little easy for you. Using keyboard shortcuts not only saves your time but also makes you smart. We have listed all the major shortcuts of explorer and windows.

ALT+- (ALT+hyphen)Displays the Multiple Document Interface (MDI) child window's System menus
ALT+ENTERView properties for the selected item
ALT+SPACEBARDisplay the System menu for the active window
ALT+F4Close the active item or quit the active program
ALT+ESCCycle through items in the order they were opened
ALT+Underlinedletter Display the corresponding menu
ALT+TABSwitch between open items
BACKSPACEView the folder one level up in My Computer or Windows Explorer
CTRL+XCut
CTRL+ASelect all
CTRL+BBold
CTRL+IItalics
CTRL+CCopy
CTRL+ZUndo
CTRL+OOpen an item
CTRL+UUnderline
CTRL+VPaste
CTRLwhile dragging Copy selected item
CTRL+F4Close the active document
CTRL+SHIFTwhile dragging Create shortcut to selected item
CTRL+LEFT ARROWMove the insertion point to the beginning of the previous word
CTRL+DOWN ARROWMove the insertion point to the beginning of the next paragraph
CTRL+RIGHT ARROWMove the insertion point to the beginning of the next word
CTRL+UP ARROWMove the insertion point to the beginning of the previous paragraph
SHIFT+DELETEDelete selected item permanently without placing the item in the Recycle Bin
ESCCancel the current task
F1Displays Help
F2Rename selected item
F3 Search for a file or folder
F4Display the Address bar list in My Computer or Windows Explorer
F5Refresh the active window
F6 Cycle through screen elements in a window or on the desktop
F10Activate the menu bar in the active program
SHIFT+F10Display the shortcut menu for the selected item
CTRL+ESCDisplay the Start menu
SHIFT+CTRL+ESCLaunches Task Manager
SHIFTwhen you insert a CD Prevent the CD from automatically playing
WINDisplay or hide the Start menu
WIN+BREAKDisplay the System Properties dialog box
WIN+DMinimizes all Windows and shows the Desktop
WIN+EOpen Windows Explorer
WIN+FSearch for a file or folder
WIN+F+CTRLSearch for computers
WIN+LLocks the desktop
WIN+MMinimize or restore all windows
WIN+ROpen the Run dialog box
WIN+TABSwitch between open items


       Windows Explorer Shortcuts: 


ALT+SPACEBARDisplay the current window’s system menu
SHIFT+F10Display the item's context menu
CTRL+ESCDisplay the Start menu
ALT+TABSwitch to the window you last used
ALT+F4Close the current window or quit
CTRL+ASelect all items
CTRL+XCut selected item(s)
CTRL+CCopy selected item(s)
CTRL+VPaste item(s)
CTRL+ZUndo the last action
CTRL+(+)Automatically resize the columns in the right-hand pane
TABMove forward through options
ALT+RIGHT ARROWMove forward to a previous view
ALT+LEFT ARROWMove backward to a previous view
SHIFT+DELETEDelete an item immediately
BACKSPACEView the folder one level up
ALT+ENTERView an item’s properties
F10Activate the menu bar in programs
F6Switch between left and right panes
F5Refresh window contents
F3Display Find application
F2Rename selected item


!!! Enjoy It !!!

Protect Any Folder Without Any Software

4:12 PM Posted by Magneto Mohit No comments

Folder Lock Icon


In this post, I will show you an interesting and useful trick to Password Protect Folder Without Using Any Software using batch file programming. This trick will work on all windows platform (Win XP, Win 7). Follow below tutorial to learn this trick.


How To Lock Folder?

  • Open Notepad and Copy code given below into it.
cls
@ECHO OFF
title quickwiki.info
if EXIST "Control Panel.{21EC2020-3AEA-1069-A2DD-08002B30309D}" goto UNLOCK
if NOT EXIST MyFolder goto MDMyFolder
:CONFIRM
echo Are you sure to lock this folder? (Y/N)
set/p "cho=>"
if %cho%==Y goto LOCK
if %cho%==y goto LOCK
if %cho%==n goto END
if %cho%==N goto END
echo Invalid choice.
goto CONFIRM
:LOCK
ren MyFolder "Control Panel.{21EC2020-3AEA-1069-A2DD-08002B30309D}"
attrib +h +s "Control Panel.{21EC2020-3AEA-1069-A2DD-08002B30309D}"
echo Folder locked
goto End
:UNLOCK
echo Enter password to Unlock Your Secure Folder
set/p "pass=>"
if NOT %pass%== quickwiki goto FAIL
attrib -h -s "Control Panel.{21EC2020-3AEA-1069-A2DD-08002B30309D}"
ren "Control Panel.{21EC2020-3AEA-1069-A2DD-08002B30309D}" MyFolder
echo Folder Unlocked successfully
goto End
:FAIL
echo Invalid password
goto end
:MDMyFolder
md MyFolder
echo MyFolder created successfully
goto End
:End
  • Save the notepad file as lock.bat (.bat is must)
  • Now double click on lock.bat and a new folder will be created with name MyFolder
  • Copy all your data you want to protect in that New folder
  • Now double click on lock.bat and when command prompt appears Type Y and press enter.
  • Now MyFolder will be hidden from your view, to access that folder double click on lock.bat
  • It will ask for password enter your password and done. (Default password is quickwiki) 
To change the password replace quickwiki with  new password in the above code


How To Further Secure?


You might be thinking that anyone can access the password by opening that lock.bat file in Notepad or any other text editor. To make it more secure hide lock.bat in some secure location after following the above tutorial To access the secured file double click on lock.bat. I would suggest copying lock.bat file into Pendrive and copying it into your computer whenever you required access to your protected files.

Wednesday, May 17, 2017

Windows Cannot Find Gpedit.msc Error and its Solution

4:12 PM Posted by Magneto Mohit , No comments


You may get Windows Cannot Find gpedit.msc Windows PC (Group Policy Editor) File error issue if you cannot get a copy of gpedit.msc file on your PC. This error means that the system cannot locate the file specified. This error mostly occurs when you are trying to activate the action center, but it seems that you don’t have any gpedit.msc file on your Windows PC. This is also one of the most common error issues facing mostly by the Windows PC users on their PC again and again. You may also get this error sometimes when are trying to enable KERNEL Mode printer driver.

So, if you are also one of them who are getting or facing this type of error code problem on your Windows PC and frustrating with this error but couldn’t find any right guide or solutions for getting back from it then you have to read & check out this below Windows Cannot Find Gpedit.msc article once now for surely getting the very comfortable best methods from here for completely get rid out of this type of error code issue.

This shows an error code message like:


Windows Cannot Find gpedit.msc Windows PC File Make sure you typed the name correctly & then try again

Causes of Windows Cannot Find gpedit.msc Windows PC (Group Policy Editor) File Error Issue:

  • Group Policy Editor is not installed on your version of Windows
  • Virus/Malware infection
  • Windows PC error issue
  • Permission malfunction
  • Operating System (O.S.) edition restriction

So, here are some new very best natural methods & solutions for fixing and solving this type of Windows Cannot Find gpedit.msc Windows PC (Group Policy Editor) File error code problem issue from your Windows PC permanently.

How to Fix & Solve Windows Cannot Find gpedit.msc Windows PC (Group Policy Editor) File Error Problem Issue

Download and Install Group Policy Editor Manually


For x32 Version of Windows:

  • Download an archived gpedit Installer from here below


  • Unzip it by using (WinRar, Winzip or 7-Zip)
  • Run the Setup file
  • Wait until it completes
  • After downloading, install it on your PC
  • Now, Press Win+R Key to run Group Policy Editor
  • Type ‘gpedit.msc‘ there
  • Press Enter or OK option there to start it
  • After completing, close all the tabs
  • That’s it, done
So from this above guide, you will get back from this Cannot find gpedit.msc Windows 10 error on your Windows 32 bit version.

For x64 Version of Windows 7, 8, 8.1 or more:


  • Go to the C:\Windows
  • Open ‘SysWOW64‘ folder
  • From there, copy the below folders & files
    1. Gpedit.msc file
    2. GroupPolicy Users Folder
    3. GroupPolicy Folder
  • After copying these above folders & files,
  • Paste them to this below folder
    1. C:\Windows\System32
  • Now, Type ‘gpedit.msc.’ Command in RUN
  • That’s it, done
  • After completing, close all tabs
By downloading and installing Group policy editor manually can easily get rid out of this Windows Cannot Find gpedit.msc Windows 10 error code problem.

So, here are these some quicky tips and natural methods and solutions for fixing and solving this type of Windows Cannot Find Gpedit.msc Windows PC (Group Policy Editor) File error code issue from your Windows PC permanently. Hope these solutions will surely help you to get back from this error Windows 10 cannot find gpedit.msc file problem.

Tuesday, September 13, 2016

Malwarebytes

12:25 AM Posted by Magneto Mohit , No comments


Malwarebytes Anti-Exploit


Malwarebytes Anti-Exploit protects you against the security vulnerabilities in the code, which make up your software programs. Your software contains millions of lines of code, which unfortunately some people want to exploit.

Malwarebytes Anti-Exploit protects you from these vulnerabilities which people can manipulate in order to infect your system with malware. The software gives you three layers of security protection around popular browsers and applications, thereby preventing the vulnerable code from being exploited.

The software is not an antivirus product in itself, but it is compatible with most antivirus software.

Features


  • It protects browsers and their add-ons
  • Protects browser components
  • Protects media players and PDF readers
  • Allows you to manage custom shields
  • Best of all, it's free!


Note:- Quick Wiki care for its users and this is why some of the download links will open official sites for the virus free downloads.

Sunday, September 11, 2016

How To Prevent Windows 10 From Automatically Download Updates

6:08 PM Posted by Magneto Mohit , No comments


Windows 10 Updates


Windows 10 PCs automatically check for updates and install any updates they find. You can take some control over this and have Windows 10 install updates on your schedule, but these options are hidden. Windows Update really wants to automatically update on Windows 10.

Professional, Enterprise, and Education editions of Windows 10 have access to group policy and registry settings for this, but even Home editions of Windows 10 give you a way to stop updates from automatically downloading.

Prevent Automatic Downloading of Updates on a Specific Connection


When you set a connection as “metered,” Windows 10 won’t automatically download updates on it. Windows 10 will automatically set certain types of connections — cellular data connections, for example — as metered. However, you can set any connection like as a metered connection.

So, if you don’t want Windows 10 automatically downloading updates on your home network connection, just set it as a metered connection. Windows 10 will automatically download updates when you connect your device to an unmetered network, or when you set the network it’s connected to as unmetered again. And yes, Windows will remember this setting for each individual network, so you can disconnect from that network and reconnect all you like.

Do you have an Internet connection with limited data? Just mark it as metered and Windows 10 won’t automatically download updates on it. If your connection offers unlimited downloads at a specific time — for example, during the middle of the night — you could mark the connection as unmetered occasionally at these times to download updates and mark it as metered after the updates are downloaded.

To change this option, open the Settings app, select Network & Internet, scroll down, and select “Advanced options” below the list of Wi-Fi networks. Enable the “Set as metered connection” option. This option only affects the Wi-Fi network you’re currently connected to, but Windows will remember this setting for each individual Wi-Fi network.


Metered Connection


After enabling this option, Windows Update will say “Updates are available. We’ll download the updates as soon as you connect to Wi-Fi, or you can download the updates using your data connection (charges may apply.)” By marking a connection as metered, you’ve tricked Windows into thinking it’s a mobile data connection — for example, you might be tethering your PC to your smartphone. You can click the Download button to download and install updates at your leisure.


Windows Update


Stop Windows Update From Automatically Rebooting Your Computer


Windows 10 normally schedules reboots for when you aren’t using your computer. For example, it might try to schedule a reboot at 3 a.m. after installing updates. This is an improvement from previous versions of Windows, which wanted to reboot as soon as possible.

You can tell Windows Update to reboot on a schedule you choose instead. To change this setting, open the Settings app, select Update & security, select “Advanced options” at the bottom of the Windows Update pane, and select “Notify to schedule restart” instead of “Automatic (recommended).” Windows will ask you when you want to reboot after it installs updates.


Schedule Updates


Prevent Windows Update From Installing Specific Updates and Drivers


If Windows 10 insists on installing a specific update or driver that’s causing problems, you can prevent Windows Update from installing that particular update. Microsoft doesn’t provide a built-in way to block updates and drivers from automatically being downloaded, but it does offer a downloadable tool that can block updates and drivers so Windows won’t download them. This gives you a way to opt out of specific updates — uninstall them and “hide” them from being installed until you unhide them.


Hide Updates


Use Group Policy to Disable Automatic Updates — Professional Editions Only


Editor’s Note: You should really consider leaving automatic updates enabled for security reasons.

There’s actually an option that will let you choose how updates are installed on your own schedule, but it’s buried in Group Policy. Only Professional, Enterprise, and Education editions of Windows 10 have access to the Group Policy editor. To access the group policy editor, press Windows Key + R, type the following line into the Run dialog, and press Enter:

gpedit.msc

Navigate to Computer Configuration\Administrative Templates\Windows Components\Windows Update.


Locate the “Configure Automatic Updates” setting in the right pane and double-click it. Set it to “Enabled,” and then select your preferred setting. For example, you can choose “Auto download and notify for install” or “Notify for download and notify for install.” Save the change.


Configure Updates


Visit the Windows Update pane, click “Check for updates,” and then select “Advanced options.” You should see your new setting enforced here. You’ll also see a note saying “Some settings are managed by your organization,” informing you that these options can only be changed in Group Policy.

To disable this later, go back to the Group Policy editor, double-click the “Configure Automatic Updates” setting, and then change it from “Enabled” to “Not configured.” Save your changes, visit the Windows Update pane again, click “Check for updates,” and then select “Advanced options.” You’ll see everything change back to the default setting. (Windows Update only seems to notice the setting change after you click “Check for updates.”)


Advanced Option


Use the Registry to Disable Automatic Updates — Professional Editions Only


This setting can be configured in the registry, too. This registry hack does exactly the same thing as the above Group Policy setting. However, it also only seems to work on Professional editions of Windows 10.

Download our Disable Automatic Updates on Windows 10 registry hack and double-click one of the included .reg files to make Windows Update notify for download and notify for install, auto download and notify for install, or auto download and schedule the install. There’s also a .reg file that will delete the registry value the other files create, allowing you to go back to the default settings. This only worked when we tried it on Windows 10 Pro, not Home.

After changing this option, visit the Windows Update pane in the Settings app and click “Check for updates.” You can then click “Advanced options” and you’ll see your new setting here. (You have to perform a check for updates before Windows Update notices your changed setting.)


Advanced Install Options


If you’d like to do this yourself, the exact setting you’ll need to change is under HKEY_LOCAL_MACHINE\SOFTWARE\Policies\Microsoft\Windows\WindowsUpdate\AU — you’ll need to create the last few keys there. Create a DWORD value named “AUOptions” under the AU key and give it one of the following values:


00000002 (Notify for download and notify for install)

00000003 (Auto download and notify for install)

00000004 (Auto download and schedule the install)


There’s another “trick” making the rounds for this. It involves disabling the Windows Update system service in the Windows services administration tool. This isn’t a good idea at all, and will prevent your computer from receiving even crucial security updates. While it would be nice if Microsoft offered some more choice of when to install updates, you shouldn’t opt out of security updates entirely. To prevent Windows from automatically downloading updates on any PC, just set its connection as metered.


How To Hide Zip Files Inside An Image In Windows

12:18 PM Posted by Magneto Mohit , No comments

hide file


If you don't wanna use any software to hide your stuff then you can do so by following this trick to hide your files.

Since images are read from the header down, and zip files are read from the footer up, you can easily merge them as one single file , and no one will ever know. Read on to find out how.


Embedding Zip Files Inside Image Files


We tested this procedure using .png, .jpg, and .gif files and it worked with all three file types.

The first thing you will need to do is drill down into the directory that’s holding both your image file as well as your zip file, so press the Win + R keyboard combination, type cmd into the run box and hit enter. When the command prompt opens, use the cd command to change directories.


step 1 image


All it takes to merge the files is one simple copy command, the trick is to use the /B switch, which creates a binary file.


copy /B picture.gif+YourMenu.zip newfile.gif


This assumes:


  • The original image is named picture.gif
  • The zip file you want to hide in your image is called YourMenu.zip
  • The combined image file will be called newfile.gif
  • image


step 2 image


The result is a file that can be opened with an archiving program, such as 7-Zip or WinRAR, as well as with an image editor.


step 3 image


To access your hidden files again, open the 7-Zip File Manager, navigate to the newfile.gif file, and extract your hidden files from the image file.


Related Links:-

How to hide files inside an image in Linux

Saturday, September 10, 2016

How To Uninstall Windows 10 Pre-Installed Apps

10:39 PM Posted by Magneto Mohit , No comments


windows 10


Windows 10 includes a variety of universal apps, and there’s no easy way to hide them from the “All Apps” view in the new Start menu. You can uninstall them, but Microsoft doesn’t allow you to easily uninstall them in the usual way.

You probably don’t want to do this. These apps take up very little space on your device so it’s best to just ignore them if you don’t want to use them. But, if you really want to uninstall them, you can. If you’ve already uninstalled included apps, you can get them all back with a single command.


Uninstall the App Normally

Some apps allow you to uninstall them in the normal way. Just right-click an app in the All Apps list in the Start menu and select “Uninstall”. (On a touch screen, long-press the app instead of right-clicking.)

This trick appears to work for the included Get Office, Get Skype, Get Started, Microsoft Solitaire Collection, Money, News, Phone Companion, and Sports apps. You can also uninstall bloatware apps your PC manufacturer has installed using this trick. However, Microsoft’s other included Windows 10 apps can’t be removed in this way.


Use PowerShell to Uninstall Built-in Apps

You can uninstall most of the built-in apps — even ones that don’t normally offer an “Uninstall” option — with a PowerShell cmdlet. This trick won’t allow you to remove a few of the most important built-in apps, including Cortana and Microsoft Edge. If you try, you’ll see an error message saying they can’t be removed.

First, open PowerShell as administrator. Open the Start menu, search for “PowerShell,” right-click the PowerShell shortcut, and select “Run as administrator.” Agree to the UAC prompt.


Copy and paste one or more of the following commands into the PowerShell prompt, pressing Enter after each one to remove the apps you don’t want on your Windows 10 system:


Uninstall 3D Builder:

Get-AppxPackage *3dbuilder* | Remove-AppxPackage


Uninstall Alarms and Clock:

Get-AppxPackage *windowsalarms* | Remove-AppxPackage


Uninstall Calculator:

Get-AppxPackage *windowscalculator* | Remove-AppxPackage


Uninstall Calendar and Mail:

Get-AppxPackage *windowscommunicationsapps* | Remove-AppxPackage


Uninstall Camera:

Get-AppxPackage *windowscamera* | Remove-AppxPackage


Uninstall Contact Support:

This app can’t be removed.


Uninstall Cortana:

This app can’t be removed.


Uninstall Get Office:

Get-AppxPackage *officehub* | Remove-AppxPackage


Uninstall Get Skype:

Get-AppxPackage *skypeapp* | Remove-AppxPackage


Uninstall Get Started:

Get-AppxPackage *getstarted* | Remove-AppxPackage


Uninstall Groove Music:

Get-AppxPackage *zunemusic* | Remove-AppxPackage


Uninstall Maps:

Get-AppxPackage *windowsmaps* | Remove-AppxPackage


Uninstall Microsoft Edge:

This app can’t be removed.


Uninstall Microsoft Solitaire Collection:

Get-AppxPackage *solitairecollection* | Remove-AppxPackage


Uninstall Money:

Get-AppxPackage *bingfinance* | Remove-AppxPackage


Uninstall Movies & TV:

Get-AppxPackage *zunevideo* | Remove-AppxPackage


Uninstall News:

Get-AppxPackage *bingnews* | Remove-AppxPackage


Uninstall OneNote:

Get-AppxPackage *onenote* | Remove-AppxPackage


Uninstall People:

Get-AppxPackage *people* | Remove-AppxPackage


Uninstall Phone Companion:

Get-AppxPackage *windowsphone* | Remove-AppxPackage


Uninstall Photos:

Get-AppxPackage *photos* | Remove-AppxPackage


Uninstall Store:

Get-AppxPackage *windowsstore* | Remove-AppxPackage


Uninstall Sports:

Get-AppxPackage *bingsports* | Remove-AppxPackage


Uninstall Voice Recorder:

Get-AppxPackage *soundrecorder* | Remove-AppxPackage


Uninstall Weather:

Get-AppxPackage *bingweather* | Remove-AppxPackage


Uninstall Windows Feedback:

This app can’t be removed.


Uninstall Xbox:

Get-AppxPackage *xboxapp* | Remove-AppxPackage


How to Reinstall All Built-in Apps

If you decide you want the preinstalled apps back, you can get them back with a single line of PowerShell code. Again, open a PowerShell window as Administrator. Copy and paste the following line into the PowerShell window and press Enter:


Get-AppxPackage -AllUsers| Foreach {Add-AppxPackage -DisableDevelopmentMode -Register “$($_.InstallLocation)\AppXManifest.xml”}


This tells Windows to install those default apps again. Give it some time and allow it to finish, even if nothing appears to happen at first. Even if you see an error message, restart and examine your Start menu — you may just have all those default apps back again, anyway.

How To Add Tabs To File Explorer In Windows

9:56 PM Posted by Magneto Mohit , No comments


clover pic


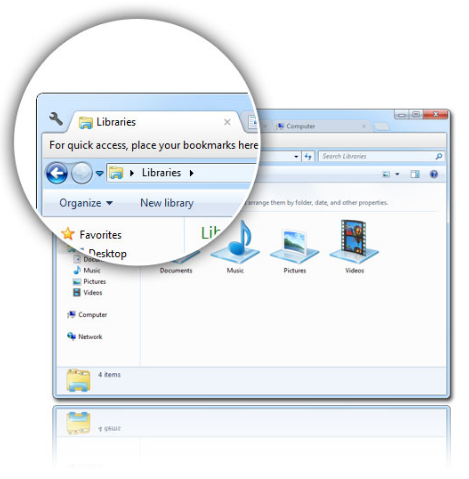
Now you can add tabs in file explorer in windows.

Adding tabs to File Explorer is one of the most-requested features for Windows 10. Despite users clamoring for it, Microsoft so far hasn’t delivered. But you don’t have to wait on Microsoft to get tabs in File Explorer. Heck, you don’t even have to be running Windows 10. If you’ve got Windows XP, 7, or 8 you can add tabs to Windows Explorer/File Explorer right now via the Clover 3 extension.

Even though it’s not officially supported, Clover 3 also works on Windows 10, and Vista users can probably give it a try too (but no promises since I haven’t tested it).

Why tabs?

Clover 3 appears to be based on Chromium, Google’s open source project that it uses to develop Chrome, which means you can use some of Chrome’s basic features with a Clover 3-powered File Explorer.

The best part of having tabs is that you no longer have to go through the annoyance of opening a second File Explorer window if you need one. Instead, you just click the new tab button or use the keyboard shortcut Ctrl + T. Then you can use the second tab just like a new window by dragging a file or folder from one tab to the other.

If you do want a second window, you can also tear one tab away and it automatically becomes its own window.

Clover 3 also has a bookmarks bar and if you drag a particular file or folder up to it, it’s only one click away. Keep in mind, however, that any files you put on the bookmarks bar will automatically open in their default program when you click on them, while folders open in Explorer.

The downsides

One last thing before we dive in is that, on Windows 10 at least, Clover 3 changes File Explorer’s menus. The Home and Share options are gone and the Computer menu option from Windows 8 gets added. One other notable change is that when you open File Explorer you will see a Clover icon in the taskbar instead of the usual File Explorer icon.

On a side note, Clover 3 automatically opens a new window by default showing the This PC view instead of Quick Access in Windows 10—don’t worry, though, Quick Access is still there.

Installing

It’s not perfect, but if you don’t mind those changes Clover 3’s pretty great to get tabs in File Explorer.

Here’s how to install it.


The extension comes as a ZIP folder; open that file and then install the EXE inside. Now, you just install Clover 3 as you would any other program. Once it’s done, click on File Explorer and you’ll see the tabs.


Click here to download:

How To Download Instagram Photos

9:45 PM Posted by Magneto Mohit , No comments


If you want to download all of your Instagram photos at once then you can do so by using this software.

4K Stogram is an Instagram Downloader for PC, Mac and Linux. The program allows you to download and backup Instagram photos and videos, even from private accounts. Just enter Instagram user name or photo link and press 'Follow user' button. Open up wide new vistas of imagery all from your desktop. Try it!

No toolbars, no adware, no malware. And best of all it's FREE Instagram Downloader. Enjoy your images anywhere, any time. And then you can use 4K Slideshow Maker to make a slideshow presentation!


Features


  • Grab photos of few account simultaneously and save it in JPEG on your desktop.
  • Follow your favourite photographers and get their latest photos automatically.
  • Login with your Instagram credentials and download photos of private friends accounts.
  • Access to your viewer directly from the application.
  • Download Instagram video in MP4 format.
  • Enjoy the minimalistic interface of application.
  • Use 4K Stogram on your PC, Mac or Ubuntu for free.


Download this software:

Sunday, August 28, 2016

How To Configure A Router

5:07 PM Posted by Magneto Mohit , No comments


The procedure for accessing to the control panel of a router and adjust all the settings you need to connect to the web is simple. Even if you’ve never handled one, you'll not find any difficulty in carrying it out. Let’s see together, step by step, all you need to do and how to do it!


The first things you need to do is to connect the router to a power outlet , the line and the computer using an ethernet cable. If your router has a power button, you press it to let the device in operation.


At this point, start your favorite web browser on your PC (example Firefox, Internet Explorer, etc.) and connect to the address 192.168.1.1 to access the router’s configuration panel. If you encounter any problems, try using the address 192.168.0.1.


To access the panel of the router, you will be prompted to enter a username and a password. Commonly, the key combination is admin/admin but in some cases you have to use other settings that can be found in the user manual of the router.


Once in the control panel of the router should start automatically, the initial setup of the device. Otherwise , find the button to start it (example Setup wizard ) and click on it.

Saturday, August 27, 2016

How To Get Wifi Password From Computer

11:33 AM Posted by Magneto Mohit No comments


Did you encounter the scene that you are using a laptop connected with Internet via Wi-Fi, you also want to make your smartphone connect with Internet but you don't know the password? Actually, when the computer is connected with Wi-Fi, it will save the password of the Wi-Fi automatically. All you need to do is to find the password in the computer and remember them. This can be done in a few seconds without any other tools and complex operations. Here are the steps which will show you how to get Wi-Fi password from computer. The example shown below is based on Windows 8, but the situation in windows 7 is almost the same.


First, you should go to the Desktop to begin the operation. Find the icon "signal symbol like the one in smartphones" at the bottom right corner and right click on the icon. Then a menu will be shown. Click on the option "Open Network and Sharing Center" to continue.


The window of Network and Sharing Center will be opened. You'll see your current connected network. Click on the blue underlined text "WLAN" or "WiFi" to continue.


The window of your connection status will be opened. Find the button "Wireless Properties" and click on it.


Switch the tab to "Security" and tick off the checkbox before "Show characters", then you'll see the password is shown. You can write down the password to record it. Click on the button "OK" and close the "Network and Sharing Center" to end the operation.

Wednesday, July 1, 2015

Top 10 Coolest Features In Windows 10

8:53 PM Posted by Magneto Mohit No comments


1. It's Free


One of the biggest new developments in the Windows 10 story is that it will be completely free to upgrade. Microsoft made this announcement at its January event in Redmond.
The firm has said it will be available at no charge for the first year (although it may end up extending that) for Windows 8.1 and Windows Phone 8.1 users. It will also be free if you're still running Windows 7.


2. Start Menu 

As we knew prior to the January briefing, Windows 10 will mark the return of the much loved Start Menu. In the latest build shown, it has some updated graphics and can optionally go full-screen. Half of the menu looks pretty much like it did in Windows 7 but there's the obvious addition of Live Tiles.


3. Cortana


As we expected, Cortana is one of the headline features of Windows 10 – at least as far as Microsoft is concerned. The digital assistant, which rivals Siri and Google now, has been available on Windows Phone for a while will come to PCs and tablets.

Cortana will sit next to with the Start button on the desktop, but you can invoke it by saying "Hey Cortana". You'll also be able to edit the things that Cortana knows about you to improve the service it provides. Typing to interact is also an option and you can request "show me photos from December" or "Show me PowerPoint slides about the charity presentation".


4. XBOX App And Streaming


There's good news for gamers as not only with the Xbox One get Windows 10, Microsoft has introduced some sweet new features. Windows 10 will come with the Xbox app (although there was no mention of Windows 10 for phones getting it) which has features like the ability to control the Xbox One and a DVR capture for any Windows games.

Furthermore, you'll be able to play multiplayer games cross-platform between Xbox One and PC. As if that wasn't enough, Windows 10 will support the ability to stream games from the Xbox Box – although we don't have details on the technical requirements for this yet. Oh and there's support for DirectX 12.


5. Universal Apps


The news of Universal apps is good news for anyone using more than one Windows device. A bundle of apps including Photos, Videos, Music, Maps, People & Messaging and Mail & Calendar (and presumably more in the future) will look and feel the same across different devices and screen sizes. The data will also be saved and sync automatically via OneDrive.


6. Spartan Browser


It's unclear whether this will be the new Internet Explorer but Windows 10 will come with a new browser called 'Project Spartan'. It's been built with 'interoperability' in mind, according to Microsoft. Features include a reading mode and the ability to annotate, either with a keyboard, pen or a finger. There's also integration with Cortana to provide additional information – for example, when you're on a web page for a restaurant Cortana will make a booking and display information such as opening times.


7. Enhancement


Thanks to the Windows Insider program, Microsoft is making changes suggested by Windows users around the globe. Since Windows 10 runs across all devices, the OS will have unified settings. That means the end of separate control panel and PC settings. There's also the Action Center now provides notifications and is synchronized across devices.  


8. Windows Phone


It looks like the death of Windows Phone is near as Windows 10 will arrive on Windows Phone devices when it launches. Microsoft has given no other name for it running on smartphone and small tablets.

In general, it looks much the same as Windows Phone 8 but with tweaks. As mentioned above, Action Center is synced with your other devices and the app menu will show recently installed apps at the top. Two cool new additions are the ability to float the keyboard around the screen and reply to message notifications in-line.


9. Hololens


This one might be somewhat far off and futuristic, but Windows 10 is the first holographic computing platform. A set of APIs will mean developers can create holographic experiences in the real world.
It's more like augmented reality to us but it's certainly interesting. It will work with the HoloLens which Microsoft calls the world’s first untethered holographic computer (it doesn't need to connect to a PC to work).


10. Continuum Mode


On 2in1 devices (hybrids and convertibles), Windows 10 will make life easier with a 'Continuum Mode'. This means the OS moves easily between laptop (keyboard/mouse) and tablet (touch) usage modes automatically. It will do this if it detects the loss or addition of a keyboard.

Monday, March 23, 2015

Change Windows Password Without Old Password

2:49 PM Posted by Magneto Mohit No comments


Dear Quick Wiki readers, today I am going to tell you a trick to change windows password without knowing it. As you all know without knowing the old password, we are unable to change it, but by following these few steps given below you can change it easily. This trick works for Windows Vista, Windows XP, Windows 7, Windows8. 

Procedure For Changing Windows Password Without Knowing Old

Step 1: Start Menu > Computer > Right Click > Manage


Step 2: System Tool > Local User and Group


Step 3: Double Click on User  (Example Your  PC Name)


Step 4: Choose User > Right Click on It > Set Password


Step 5: Click on Proceed button


Step 6: Then Set your New Password


Now  the password has been changed, enjoy.